





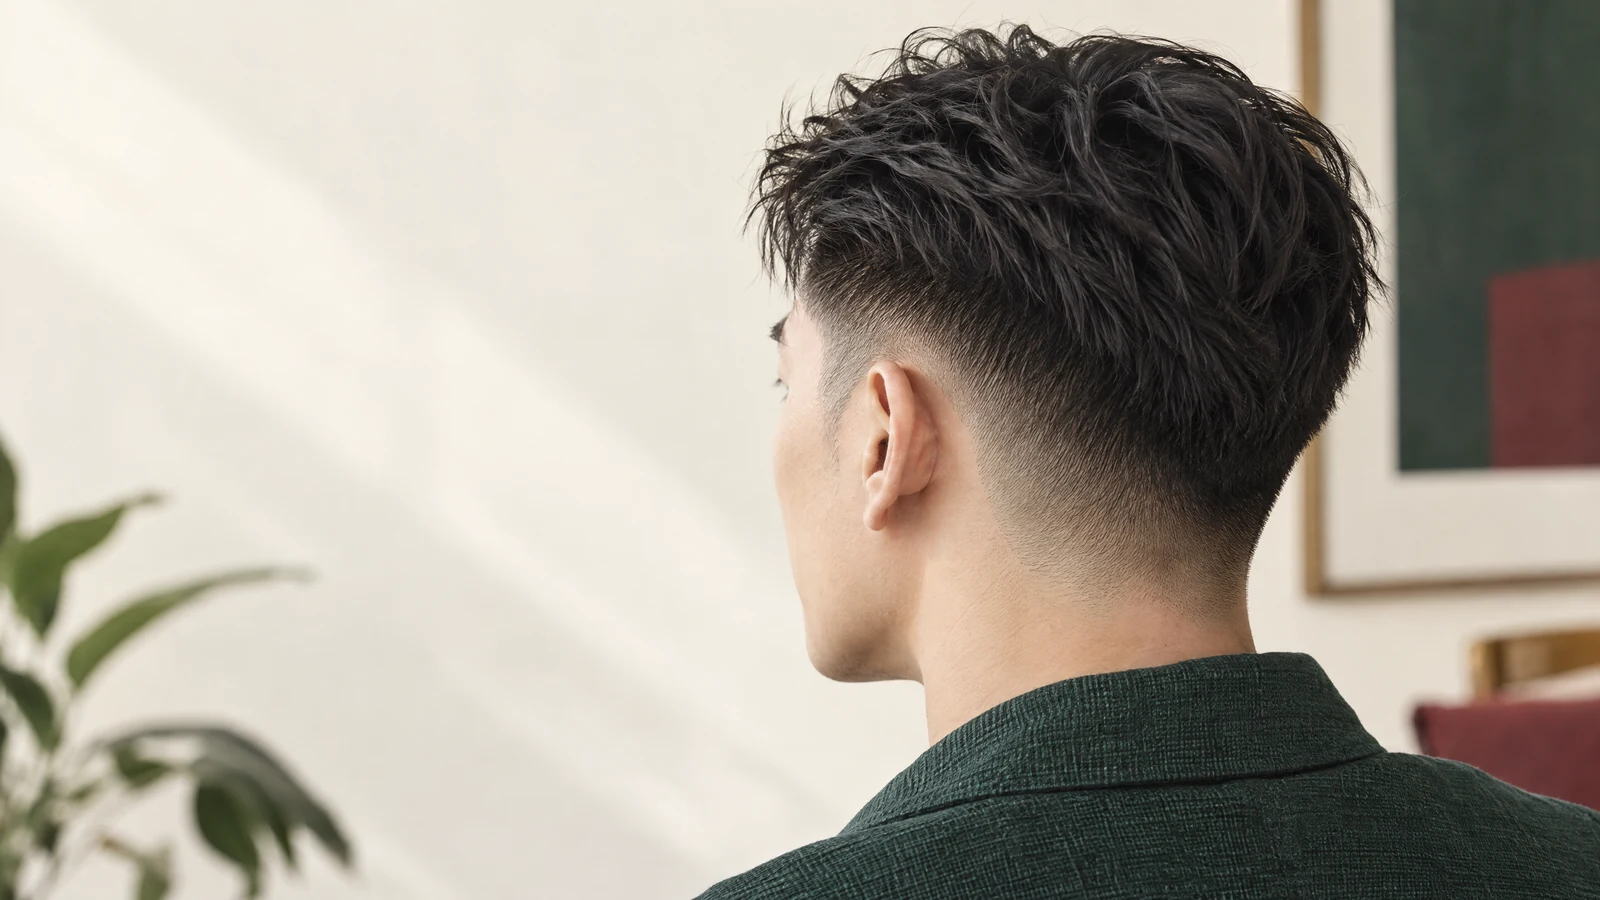
Fade haircut coverage across the sides
The taper vs fade decision starts with coverage: do you want a small change at the edges or a wider gradient across the sides? Height and shortest length are separate choices. A high transition need not mean bare skin, and a low transition can still reveal considerable scalp near the bottom.
Start by looking at the whole side panel between the ear and the top. If you like its fullness but dislike untidy edges, a local taper may be closer to your goal. If you want that panel to become visibly lighter and narrower, discuss a broader fade. Neither choice settles the top length: a fringe, a swept-back top and short texture can all need different connections to the sides.
The coverage distinction appears in Dapper Dan's taper and fade guide, which describes tapers near the temple and rear hairline, compared with fades that carry a gradient across the sides and back. Treat the labels as conversation starters. What matters is whether you and the stylist are pointing to the same areas.
Continue with skin fade vs zero fade for that specific comparison and the preparation questions it raises.
Fade haircut height is separate from its shortest length
Say whether you want visible short hair at the bottom or a skin-level appearance, then agree where that area should stop. A clipper number alone cannot describe the entire transition. If previous close shaving has caused bumps, mention it before choosing the finish. In facial-shaving advice for men with darker skin tones who get razor bumps, the American Academy of Dermatology advises avoiding close shaving and excessive pressure. This is skin-care guidance, not a rule for choosing fade height; it makes previous irritation worth discussing.
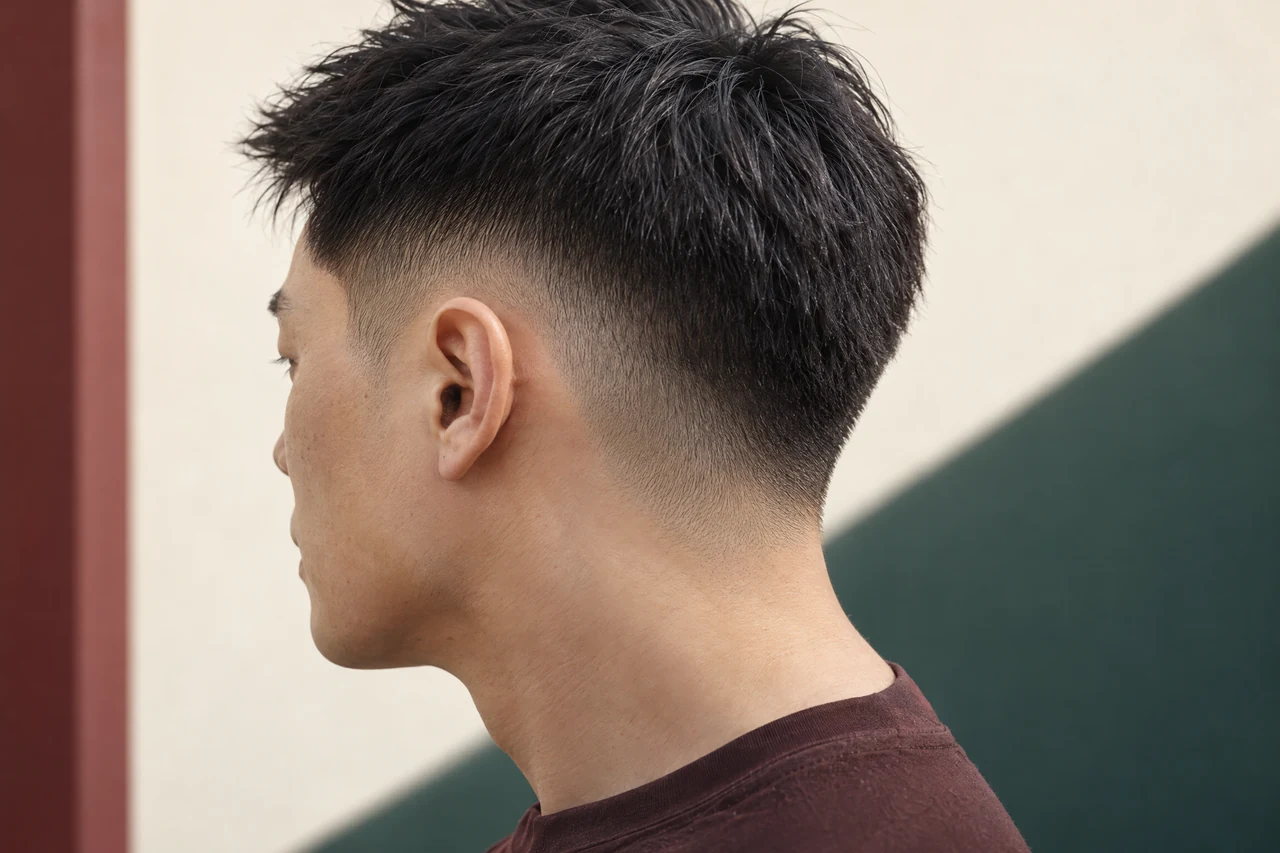
Taper haircut detail at the ears and nape
A low taper fade keeps the strongest shortening close to the lower edges rather than carrying it high around the head. Discuss the sideburn length, softness behind the ears and natural neckline. Retaining weight above those areas can suit a longer top, but the balance depends on growth direction and density.
Read the perimeter in separate parts. At the sideburn, decide the end position and whether you prefer a definite edge or a softer finish. Behind the ear, identify any hair that curls out or catches against your glasses. At the nape, look at the natural hairline rather than assuming it should become a straight horizontal line. These details can change the outline without removing the whole side panel.
For a closer look at the ear-level boundary, the men's sideburn trim guide helps you describe the length and neckline detail that should remain within a taper. Bring your usual glasses if the arms sit against this area, so the intended outline can be viewed with them on.
Taper haircut softness and retained weight
Retained weight means the visible fullness above the shorter edge. It can connect a longer top to the side, but keeping every part thick may create a shelf. Ask to see how the top falls without being lifted away from the head. For outward-growing hair, compare the natural side profile with the styled profile before deciding to cut more. A narrow taper can tidy the perimeter while leaving that upper fullness largely unchanged; it is not automatically a solution for bulk higher up.

Low, middle and high transition positions
A low fade haircut begins near the ears; a mid fade haircut moves the transition towards the temple area; a high fade haircut carries it further up the sides. For low fade vs high fade, compare the visible side area and the remaining weight under the top. Show a side view rather than relying only on the name.
A lower placement leaves more hair above the transition. This may appeal if you want a gentler change from a longer top, but the retained section still needs shaping. A middle placement reduces more of the side coverage and changes the balance around the temples. A higher placement brings the short area closer to the top, making its boundary and the head's contour more prominent. Choose that exposure because you like it, not because high is supposedly a cleaner version of low.
You can also ask for different priorities at the front and back: keep some fullness beneath the crown while reducing the side width, for example. A useful discussion identifies where fullness should stay before agreeing on a label. If you are uncertain, show the highest acceptable short boundary. That gives the stylist a limit to explain and work within rather than an invitation to remove more everywhere.
Reading the amount of exposed side area
Compare photographs with similar top length and camera angle. A tall styled top can make the same side transition look lower, while a close crop changes the proportion. Lighting also affects how much scalp appears visible, so a bright photograph is not a reliable guide to the shortest length. Look for the area where short hair becomes a darker, fuller band. Then ask whether that band should remain beneath your own top, especially when your hair is worn flat rather than styled upwards.

Curved outlines behind and around the ears
A drop fade haircut follows a line that dips behind the ear towards the nape. A burst fade haircut curves around the ear and can leave more length behind it. These describe the path of the transition, not a promise about tools or skin exposure. Discuss the back view as carefully as the side view.
With a dropped outline, notice how far the transition dips and where it meets the back. The curve changes the distribution of retained hair around the rear of the head. With a burst outline, notice the radius of the shorter area around the ear and what happens immediately behind it. The longer back could be softly connected or deliberately prominent. A side photograph alone may conceal that difference.
Dapper Dan's guide also distinguishes a burst shape by its side-focused shortening and retained back length. If you like only the ear detail in a reference, say so. You do not need to accept its longer rear silhouette or its shortest finish as part of the same request.
Drop and burst shapes are not height labels
Describe the height and the curve separately: a low transition that dips behind the ear is a clearer brief than simply asking for a drop. Show where you want the shortest area to end and where the back should stay fuller. If you are growing the rear length, identify the section that must be protected. Ask the stylist to explain the side-to-back connection before agreeing to the cut, because restoring a removed length requires growing it again.

Turn a style photograph into a precise brief
Point out the highest acceptable short area and the length you want above it. Include a view of your own unstylised hair so the discussion can account for density and growth direction. Ask about suitability, the intended finish and future trims before deciding that a photograph can be reproduced exactly.
Choose references for their useful views rather than collecting many unrelated styles. Pair a clear side angle with a rear angle of the same haircut where possible. Explain what attracts you: the narrow area near the ear, the soft connection to the top or the fuller back. A short note about what you dislike is equally valuable, such as too much scalp showing at the temples or an overly squared nape.
Use haircut reference photos to organise these views and distinguish the outline you want from the styling used in the photograph. Your own pictures should show the hair as it normally sits, including any uneven growth or outward-pointing side section.
Vit So's listed men's wash cut and blow dry is HK$380. That is the listed service price, not a separate quotation for every fade design or skin-level tool. Share your preferred outline when enquiring so the proposed work and finish can be confirmed for a visit in Sheung Wan.
Review men's haircut to check its service scope and the details to share before arranging the related work.
Mark what should stay long and what can become shorter
A practical brief might say: keep the upper sides dark, shorten close to the ears, retain visible hair at the bottom and soften the neckline. Add how you wear the top on an ordinary morning. If a reference has a lifted fringe but you usually let yours fall forward, ask to see how the connection would behave in that position. Agree on the priority when a detail cannot match the photograph: preserving coverage may matter more to you than copying its sharpness.
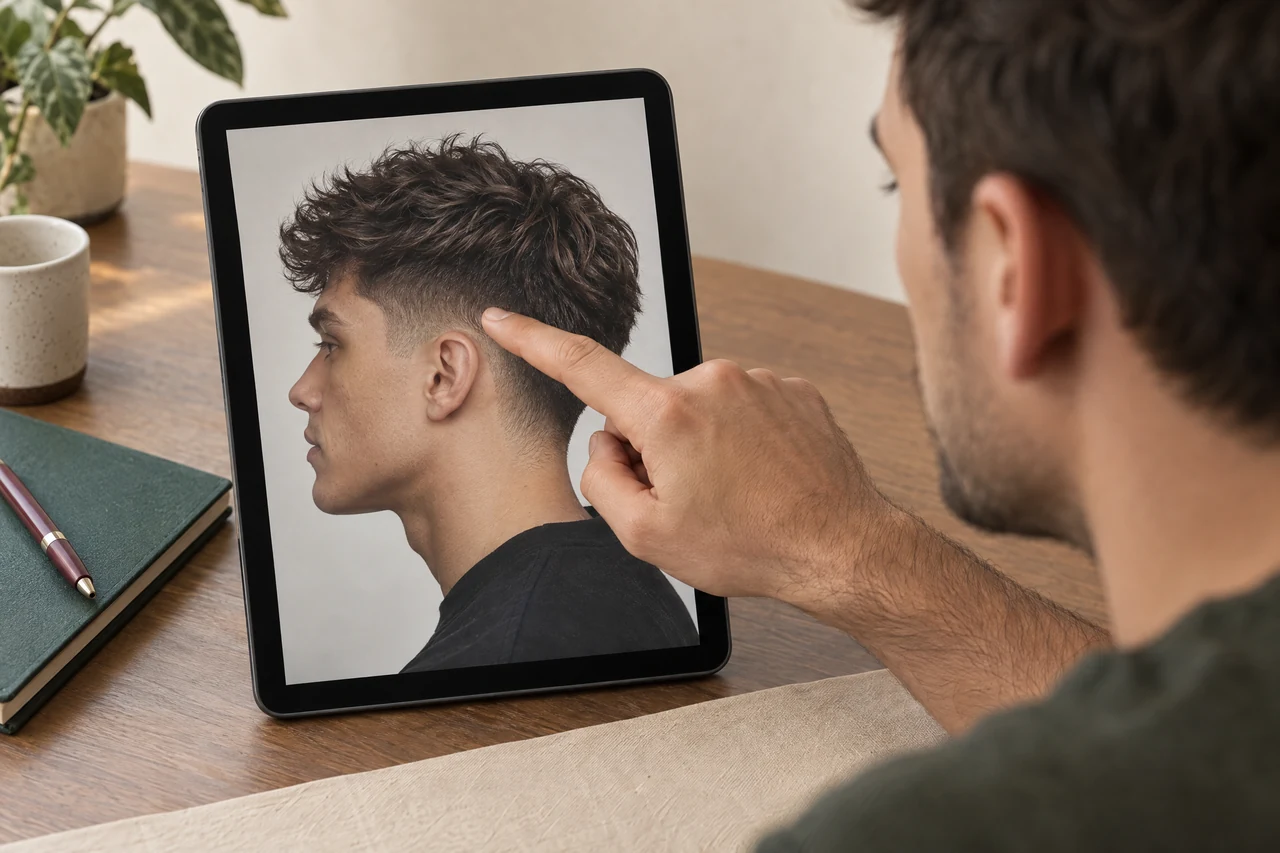
Choose an outline you can live with between trims
Think about the haircut after its freshly styled finish has settled. Is your priority a sharply visible gradient, a comfortable amount of side coverage or a soft edge that can grow without bothering you? Look at your last haircut's photographs and identify which change prompted your next visit. It may have been hair over the ears rather than the fade itself.
Continue with how often should you get a fade haircut for that specific comparison and the preparation questions it raises.
Separate top styling from perimeter upkeep
Shortening the sides does not settle how the top needs to be dried or arranged. Ask for a simple demonstration in your usual direction, then assess the outline without relying on extra height. If you want to grow the sides later, mention that before repeatedly raising the short boundary. Future trims can then be discussed around your length goal rather than automatically recreating the freshest possible contrast.

Compare placement and coverage before choosing the shortest finish
| Outline | Area and retained coverage | Detail to agree |
|---|---|---|
| Local taper | Shortening near sideburns and nape; fuller upper sides | Edge softness and sideburn endpoint |
| Low fade | Transition near the ears; more upper-side weight | Lowest length and connection behind the ear |
| Mid fade | Transition towards the temple area; less side coverage | Highest acceptable short boundary |
| High fade | Short area extends further up the sides | How the top connects without a heavy shelf |
| Drop outline | Transition dips behind the ear towards the nape | Depth of the curve and retained rear fullness |
| Burst outline | Shortening curves around the ear; back length can remain | Size of the curved area and rear connection |
Your preparation checklist
- Choose clear side and rear reference views that show the transition you like.
- Point out the highest area that may become short and the upper-side coverage that must stay.
- State whether you want visible short hair or a skin-level appearance at the bottom; confirm the proposed tools.
- Describe the sideburn endpoint, ear outline and preferred neckline softness.
- Show your natural hair and mention glasses, previous shaving irritation and any length you are growing.
- Confirm the proposed service, price and realistic everyday styling before agreeing to the work.
Frequently asked questions
Are fade and taper names used consistently?
Not always. Describe the placement, shortest length and retained weight with photographs, then ask the stylist to explain the proposed outline.
Does a fade have to reach bare skin?
No. The lowest length is a separate decision. Skin-level finishing and its tools need direct confirmation rather than being assumed from the word fade.
Which height suits a longer top?
Consider how much weight you need below the top and how much side area you want exposed. There is no single height that suits every head shape or texture.
Make your fade or taper enquiry easier to understand
Send Vit So your side and rear reference views, a photograph of your natural hair and the areas you want to keep fuller. Ask about a suitable outline and the intended finish before arranging your Sheung Wan visit. An enquiry starts the discussion; it is not a confirmed booking.
Start your WhatsApp enquirySources & further reading
- Taper vs Fade vs Burst Fade: What’s the Difference?
Local taper coverage compared with gradients across the sides and back, and retained rear length in a burst shape.
- Razor bump remedies for men with darker skin tones
Advice to avoid close shaving and excessive pressure in the specified facial-shaving context; previous irritation should be shared when discussing the shortest finish.