





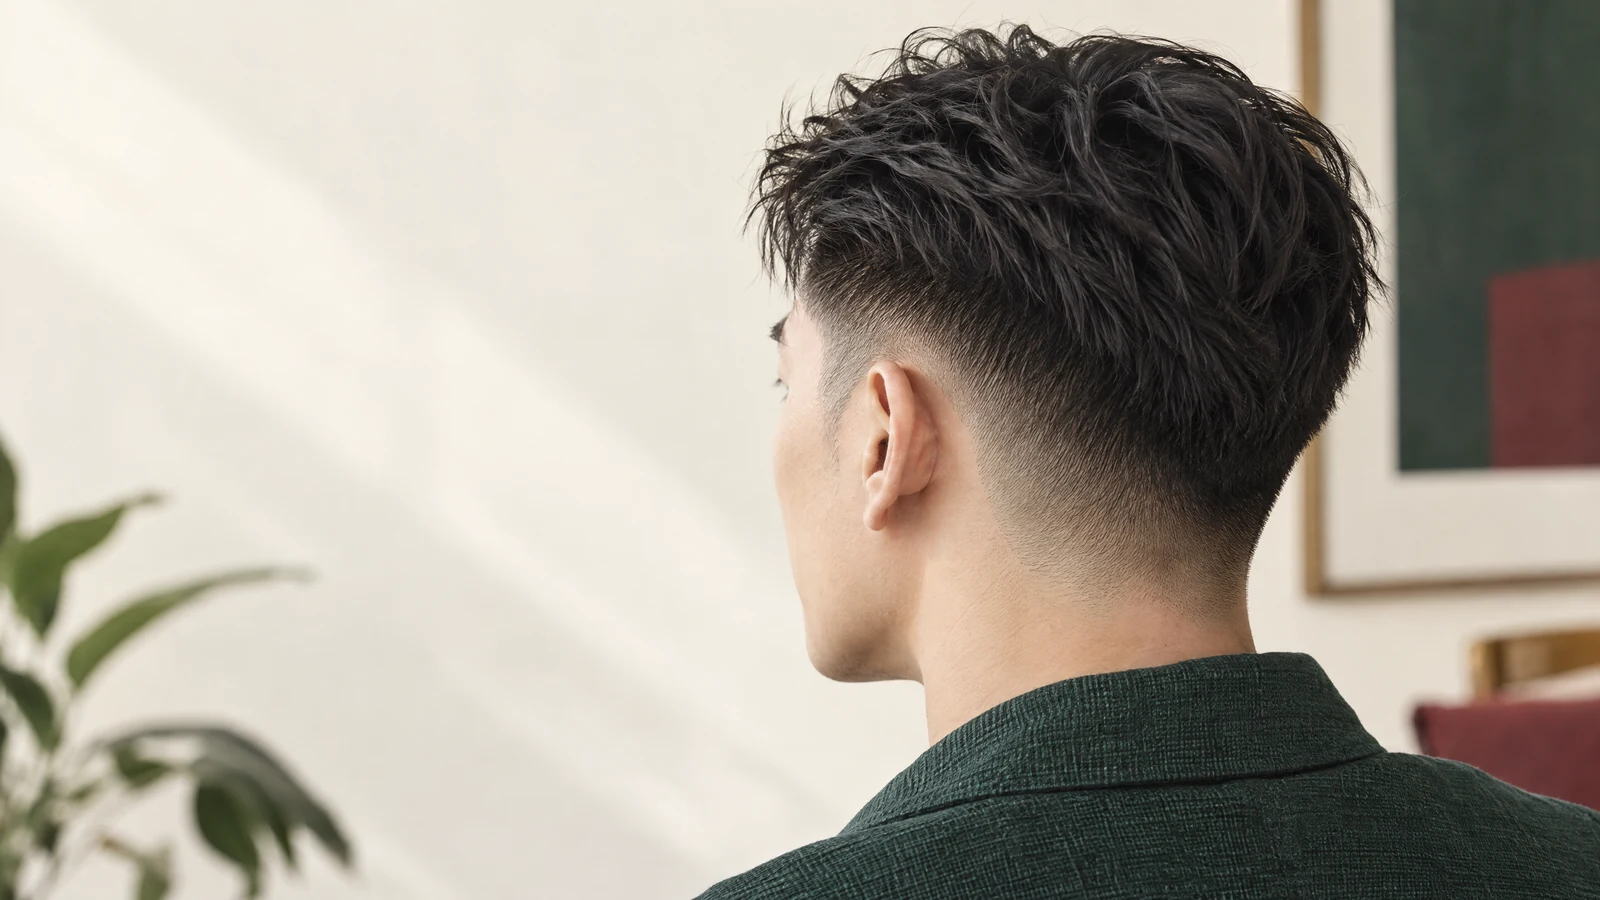
Undercut haircut contrast at the dividing line
A disconnected undercut leaves a more obvious division between the longer top and short sides. That line may be revealed when hair is swept back or hidden beneath an overlapping top. Look at both positions before choosing the cut, and explain how much contrast you want visible in your usual style.
Start by locating the boundary on a reference picture. Is the short section confined to the area around the ear, or does it extend higher towards the widest part of the head? A higher short section can leave more of the side exposed when the top moves. A lower boundary can preserve more coverage above it. Neither automatically creates the right shape: the amount of hair left over the boundary is just as important.
Disconnection describes a deliberate change in length, rather than an accidental uneven patch. In its undercut guide, Wahl distinguishes a connected version with blending from a disconnected version without it. That distinction is useful when you explain a reference: ask for a visibly separate top, or ask for the same broad contrast with a softer join. Do not rely on the word undercut to settle that choice.
Undercut haircut shape when the top overlaps the sides
An overlapping top can look smooth while lying down but show a pronounced step when lifted. Ask to see how the hair falls in your normal parting and what happens when you tuck it back. The edge may also be easier to see on one side because the parting sends more hair in the opposite direction. If you want discreet contrast for work and a more exposed outline at weekends, explain both positions before the side section is established.
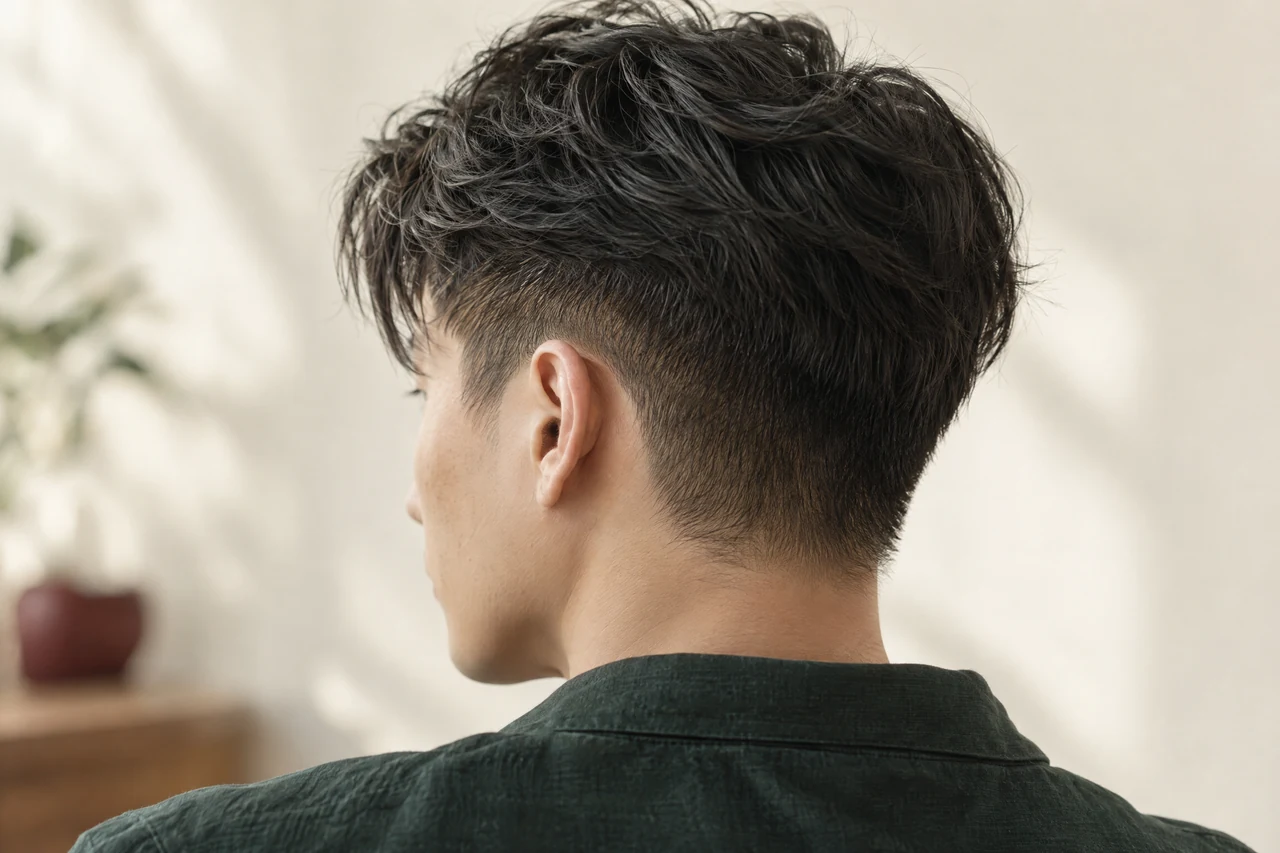
Undercut vs fade: division or gradual transition
For undercut vs fade, compare a distinct change in length with a gradual side transition. A fade describes the gradient, while an undercut emphasises the contrast under a longer top. Do not assume either name specifies the lowest length or a skin finish; those details should be discussed separately.
These ideas can exist in the same haircut. The lower sides may become progressively shorter towards the ear while the longer top remains separate above them. Conversely, a short side section can retain a fairly even length without a strong gradient. When looking at a photo, follow the side from the ear upwards, then examine where it meets the top. This separates the lower transition from the upper boundary instead of treating them as one decision.
Continue with fade haircut for that specific comparison and the preparation questions it raises.
Blending changes the overall silhouette
A blended join allows intermediate lengths to connect the top and sides. This may give the outline a more continuous curve, although the result still depends on the weight retained above the ear and behind the head. A distinct join can make the top look like a separate shape. If your complaint is a heavy ledge rather than the short sides themselves, ask whether the top edge needs adjusting. Making the lower sides even shorter may increase the contrast without addressing that ledge.

Two block vs undercut: compare weight, not labels alone
The two block vs undercut comparison is most useful when you examine how much top weight covers the sides and how sharp the dividing line appears. Two-block references often retain a fuller top and softer coverage, but names vary. Bring side views and describe the join you want rather than treating either as one fixed shape.
Look at the fringe as well as the sides. A fuller front that falls towards the eyebrows gives a different impression from a swept-back top, even if the hidden short section is similar. The rear also matters: a rounded upper shape may retain coverage over the back, whereas another reference may expose a much larger short area. Specify which part you like rather than asking to combine every feature of unrelated photographs.
Continue with two block haircut for that specific comparison and the preparation questions it raises.
Softer coverage can hide the shorter section
For a softer outline, describe how far the upper hair should fall over the short section when dry. Thick, straight hair may form a pronounced shelf if too much weight remains at that edge; a finer top may not provide the same opaque coverage. Waves can change the apparent overlap as they settle. The useful question is whether the boundary should remain visible in ordinary movement, not whether one style label is universally softer than another.

Choose the contrast with future trims in mind
Very short sides and a long top grow through different-looking stages. Decide whether you intend to maintain the contrast or eventually soften it. If you plan to grow the sides, say so before they are shortened again; changing the top-to-side relationship later may require a different transition plan.
Maintaining a disconnected shape does not always mean taking the same amount off everywhere. You may want the sides refreshed while the top gains length, or the fringe adjusted while the upper side coverage stays intact. Identify what becomes inconvenient first: side hairs projecting outwards, a heavier top edge, or a fringe that no longer sits where you want it. Those observations are more useful than following a fixed trim interval that ignores your own outline.
Continue with growing out an undercut for that specific comparison and the preparation questions it raises.
The shorter sides will reach a different stage first
The visible change is about proportion, not a claim that the sides biologically grow faster. A little extra length can noticeably change a very short section while looking less dramatic on a long top. If you want to reduce disconnection later, preserve the side length needed for a future join. A tidy ear outline and a close cut across the entire side are different requests. Explain the longer-term goal before agreeing to either.

Match the exposed boundary to your daily styling
Choose the top direction before committing to the side contrast. If you normally wear a fringe forward, assess the cut in that position rather than judging it only after a polished backward finish. For a slick back haircut, the exposed side and front hairline become especially important because the top is moved away from them. Ask whether the retained length can travel backwards comfortably without forcing your natural direction.
For a Sheung Wan workday, consider the version you can reproduce after washing, not only the finished salon photograph. If your routine is finger-styling with little product, say so. A smooth, controlled overlap and a loose textured top may require different handling. Ask for a demonstration of where to direct the roots and how much finish to use; product should support the chosen outline rather than compensate for an unwanted boundary.
Keep the longer top manageable without excessive heat
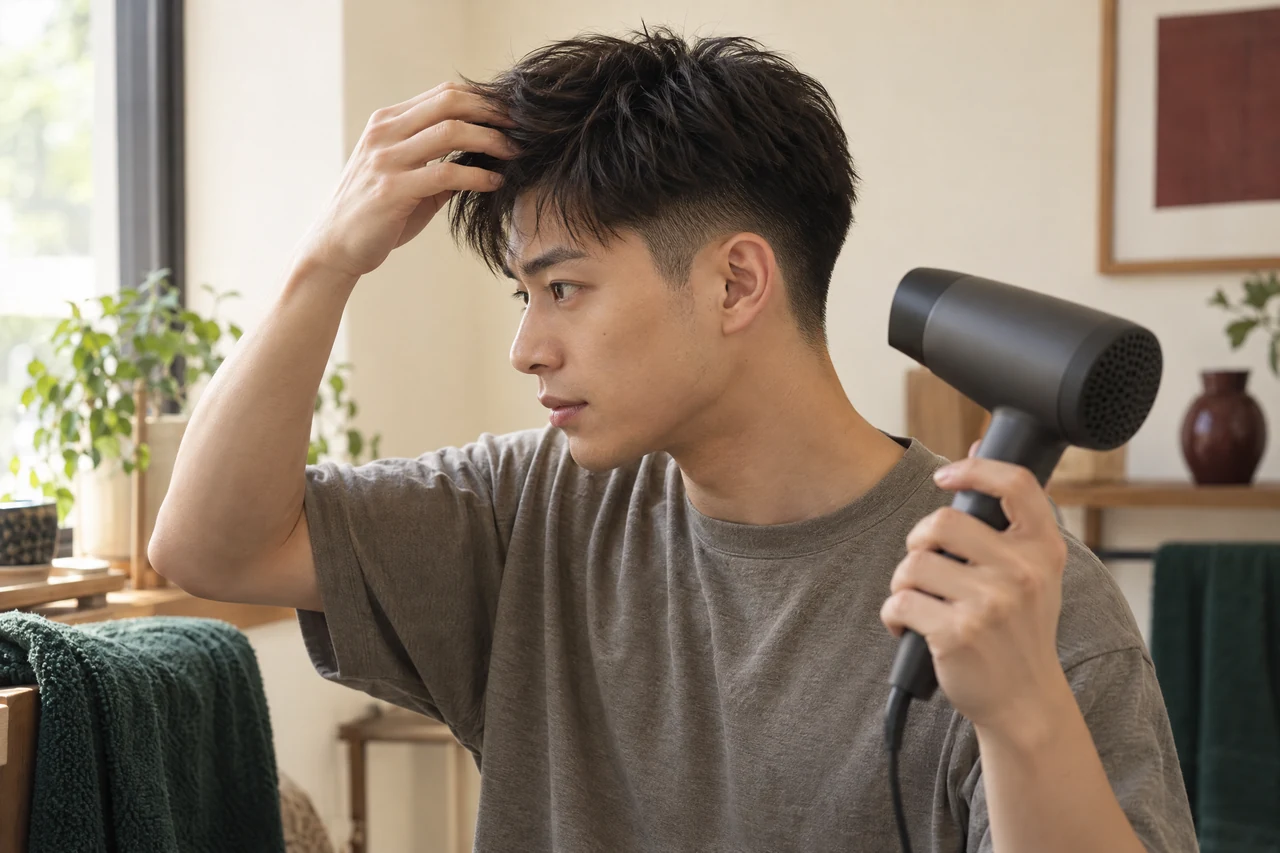
The American Academy of Dermatology's healthy-hair advice recommends limiting blow drying and hot-tool use, choosing low or medium heat settings and using a heat-protection product. It also advises gently absorbing moisture instead of rubbing hair roughly. For an undercut with a longer top, build a routine around gentle drying and the agreed direction. If the outline only works after repeated high-heat restyling, raise that practical problem when discussing the cut.
Prepare a clear undercut consultation
Bring a front view and a side or rear view that show the same haircut where possible. Point to the upper boundary, then explain the side length and the top coverage separately. A useful request is: I want the sides visibly shorter, but I would like the top to cover the join when it falls naturally. Another is: I want the division exposed when I sweep the top back, without assuming the sides must be shaved.
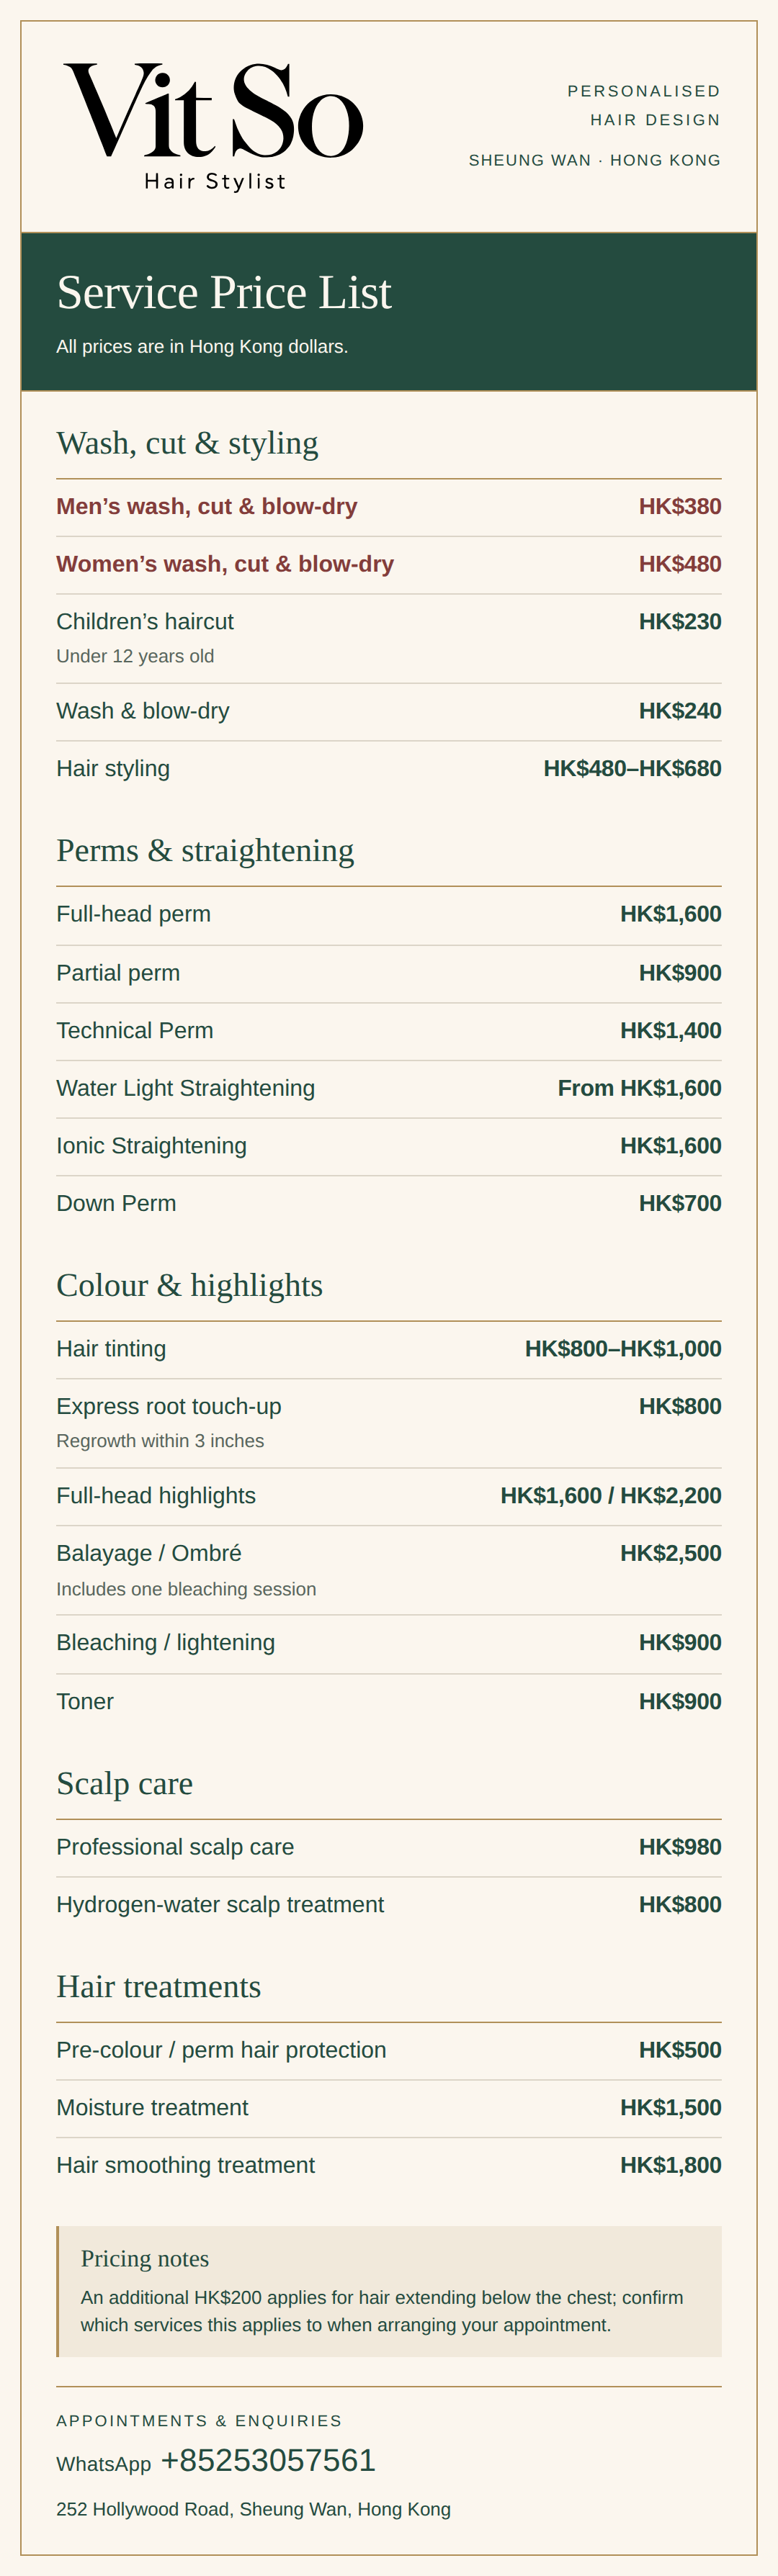
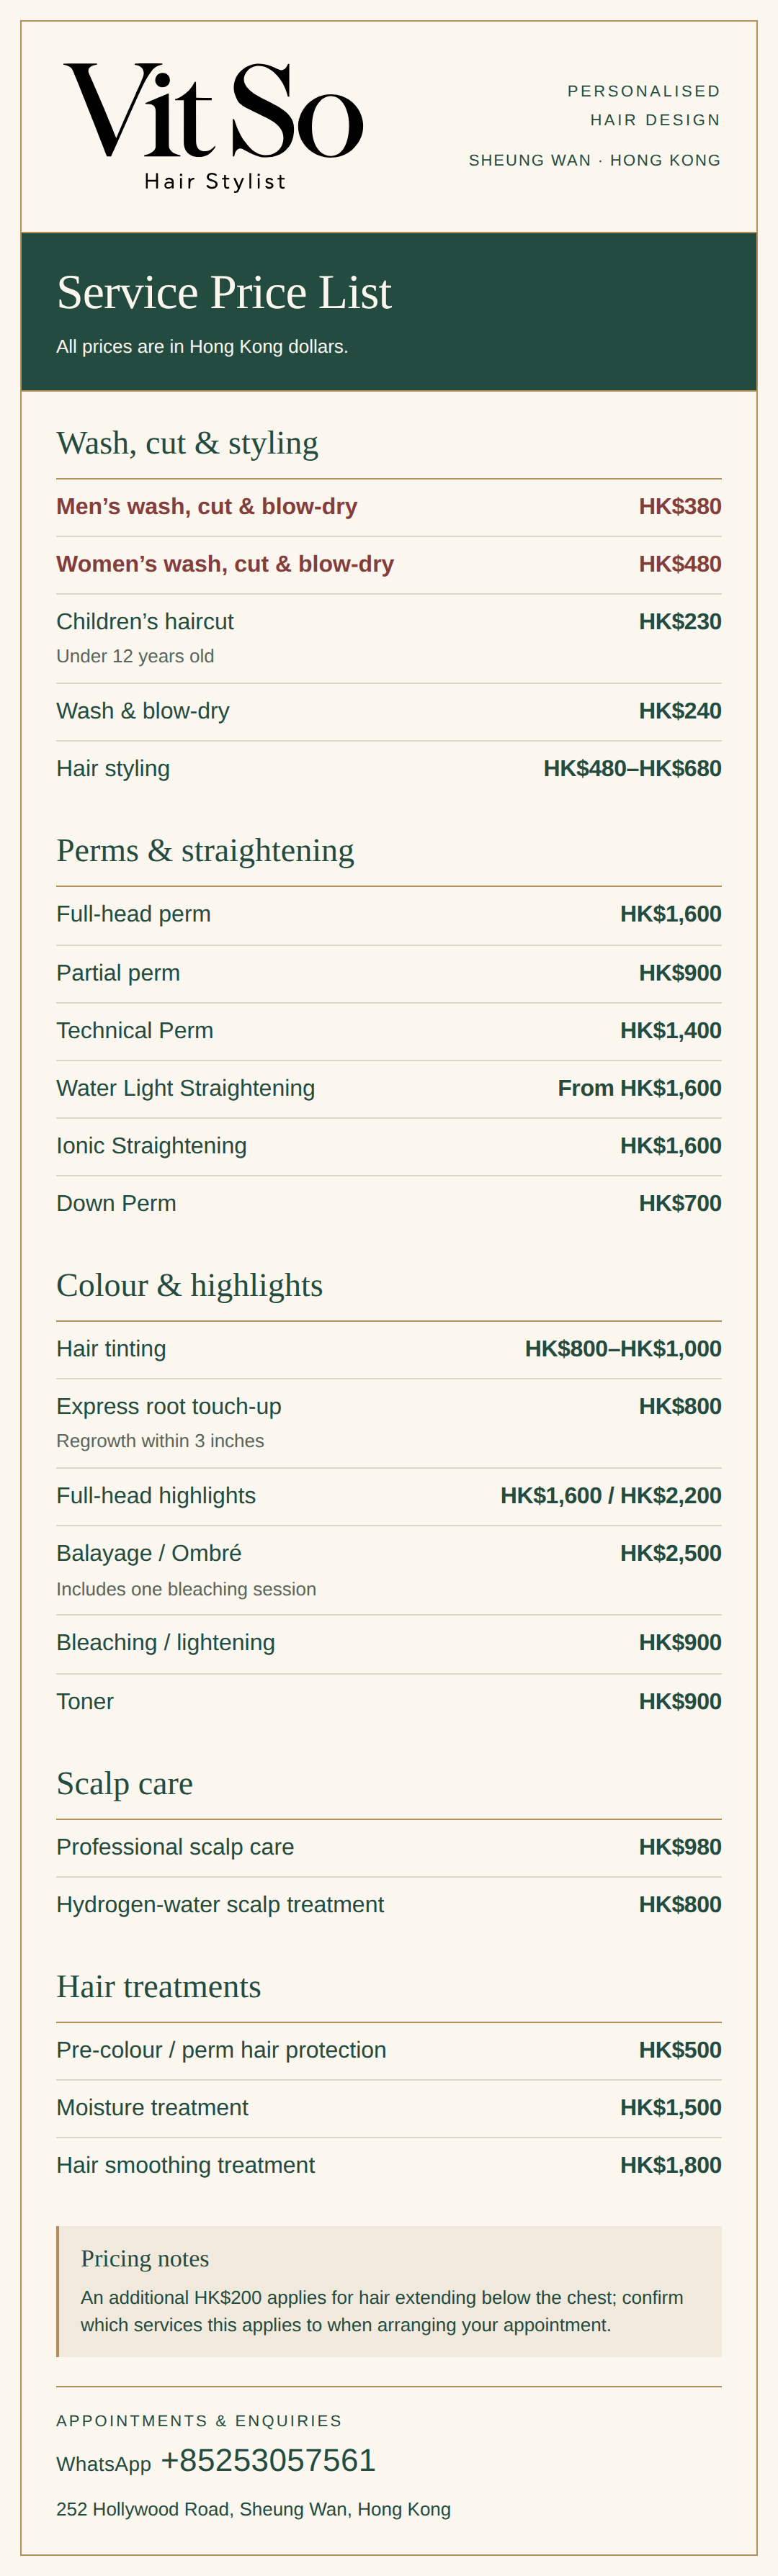
Vit So's listed men's wash, cut and blow dry is HK$380. When enquiring about a men's haircut, share your current length, reference and whether you want to keep or soften the disconnection. Confirm the requested scope rather than assuming a haircut name includes a particular tool or extra treatment. Mention an existing perm or chemical straightening if it affects how the top falls, and bring your glasses if they change the ear-area coverage you prefer.
Agree on what should remain before cutting
The most useful final check is to state the length you want to keep as clearly as the hair you want removed. Confirm whether the fringe stays long, whether the top edge should overlap, and whether the short area continues around the back. Ask to assess the finished shape with the top relaxed as well as styled. That makes it easier to understand the actual join and leave with a routine suited to the way you wear it.

Compare the upper join and lower sides as separate undercut decisions
| Outline choice | What to look for | Decision to explain |
|---|---|---|
| Disconnected undercut | Longer top meets a distinctly shorter section without intermediate blending at the join | Should the upper boundary be exposed or covered in your normal parting? |
| Undercut with a softer join | Strong top-to-side contrast remains, with a less abrupt upper edge | How much connection and side coverage should remain? |
| Fade beneath a longer top | Sides graduate in length; the upper join may still be separate | Agree on the gradient and the top boundary independently. |
| Fuller two-block reference | Upper weight and fringe may cover much of the shorter section | Show the dry overlap and rear shape rather than relying on the label. |
| Future blended shape | Enough side length must remain to work towards a connection | Tell the stylist before refreshing the entire side section closely. |
Your preparation checklist
- Choose reference views that reveal the upper join, not just the front styling; mark the boundary you want to keep or soften.
- Decide whether the sides should show when the top falls naturally and when you sweep or tuck it back.
- Describe the shortest side finish separately from the amount of top-to-side blending; do not assume undercut means skin.
- State the top and fringe length you want preserved, and explain how much daily drying or product you actually use.
- Decide whether you are maintaining the contrast or growing the sides before agreeing to another close side cut.
- Check the relaxed side and rear outline, then ask for a simple demonstration of your usual styling direction.
Frequently asked questions
Does every undercut need a shaved side?
No. Describe the actual side length and contrast. The style name does not guarantee a bare-skin finish or the availability of shaving tools.
Can I hide the dividing line?
A longer overlapping top may cover it in some positions. Check the shape with your usual parting and swept-back position, not only one styled view.
What if I want the sides to grow back?
Explain that before another close side cut. Discuss the length to preserve and whether a softer top edge can reduce the visual contrast during the transition.
Choose a top-to-side contrast you can wear comfortably
Enquire with Vit So in Sheung Wan using your current hair photo and a reference showing the side boundary. Explain whether you prefer an exposed division or softer coverage, and whether you plan to maintain it or grow it out. The requested cut, scope and appointment availability can then be discussed; an enquiry is not a confirmed booking.
Start your WhatsApp enquirySources & further reading
- How to Do an Undercut
Connected undercuts use blending at the rim while disconnected versions leave the join unblended.
- Tips for healthy hair
Gentle moisture absorption, limiting heat styling, low or medium heat settings and heat protection for the retained longer top.